Buying bitcoin is only half the job. This beginner guide walks through the full process of purchasing bitcoin on Binance and withdrawing it to a self-custody wallet, explaining why the withdrawal step matters more than the purchase itself and how to complete it safely.
Why Buying Bitcoin Is Only the First Step
When you buy bitcoin on an exchange, the exchange holds those coins on your behalf. You have a balance on their books, but you do not control the private keys that actually govern those bitcoin on the network. As Satoshi Nakamoto described in the original Bitcoin whitepaper, the entire system was designed so that value could be transferred peer-to-peer without relying on a trusted third party. Leaving bitcoin on an exchange re-introduces exactly the kind of counterparty risk Bitcoin was built to eliminate.
The goal of this guide is to walk you through both halves of the process: purchasing bitcoin on Binance and then withdrawing it to a wallet where you hold the keys. If you are new to the concept of holding your own keys, our explanation of what Bitcoin self-custody actually means is a useful companion read. Think of the exchange as a shop counter: you go in, make your purchase, and leave with your goods. You would not store your savings in the cash register of a store you visited once.
Before You Start: What You Need Ready
You will need three things before you begin: a Binance account, a funded payment method, and a self-custody wallet with a receive address. Account requirements at Binance vary by jurisdiction and can include identity verification steps that differ depending on your country, local regulatory entity, and account tier. Do not assume the process you see described in a tutorial matches what you will encounter — always check the current Binance signup flow for your region before proceeding. Supported fiat payment rails, fees, and purchase limits also vary and should be confirmed on the live official Binance fee page before you commit funds.
For the wallet, you need a non-custodial Bitcoin wallet that gives you a recovery seed phrase and lets you generate receive addresses. Hardware wallets are a strong option for beginners who want tangible security; our comparison of the Trezor Safe 5 and BitBox02 Bitcoin-only editions covers two popular choices. Software wallets on your phone can also work for smaller amounts. The critical requirement is that you — and only you — hold the backup seed phrase. Set up your wallet and confirm you can generate a receive address before you buy anything on the exchange.
Step One: Purchasing Bitcoin on Binance
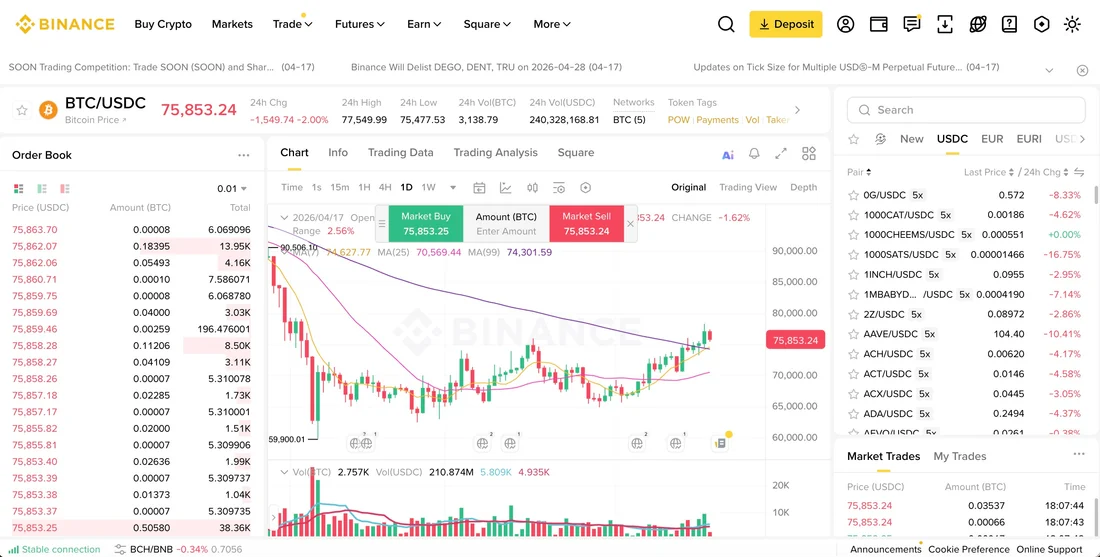
Once your Binance account is verified and a payment method is linked, navigate to the buy-crypto section. Binance offers several ways to acquire bitcoin, including direct fiat purchases and spot trading pairs. The simplest path for a beginner is usually the direct buy option, where you enter the fiat amount you want to spend and the platform converts it to bitcoin at the current rate. Be aware that the exact interface, available fiat rails, and applicable fees may differ based on your jurisdiction and account status. Always review the fee summary shown before confirming any transaction.
After the purchase completes, the bitcoin will appear as a balance in your Binance spot wallet. At this point, the exchange is custodying your bitcoin. You have a claim on coins held in Binance's infrastructure, but you do not have private keys. This is the moment many beginners stop, assuming the job is done. It is not. The next step — withdrawal to your own wallet — is what transforms an exchange balance into bitcoin you actually own in the protocol sense described by the whitepaper.
Step Two: Withdrawing Bitcoin to Your Own Wallet
Go to the withdrawal section in your Binance account and select Bitcoin (BTC). You will be asked to provide a withdrawal address and choose a network. Select the Bitcoin network (BTC mainnet) — not BEP-20 or any other network option, as sending to the wrong network can result in permanent loss of funds. Binance's own withdrawal support documentation warns users to double-check the network selection before confirming. Paste the receive address you generated from your self-custody wallet and verify the full address character by character. Do not rely on checking only a few characters at the start or end; verify the entire string matches what your wallet displays.
Binance will show you the withdrawal fee and the amount that will arrive at your wallet. Withdrawal fees are subject to change, so confirm the current fee on the official Binance fee page at the time you initiate the transaction. After you confirm the withdrawal and complete any required security confirmations on your Binance account, the exchange will broadcast the transaction to the Bitcoin network. Your wallet will show the incoming transaction once it is detected on-chain, and it will be fully settled after the network confirms it in subsequent blocks. The exact timing depends on network conditions and the fee Binance attaches to the transaction.
Verifying the Withdrawal and Securing Your Wallet
Once the transaction appears in your self-custody wallet, verify the amount and wait for confirmations. Your wallet software will typically show the transaction as pending and then confirmed. At this point, you hold bitcoin that only your private key can move. No exchange policy change, account freeze, or platform outage can prevent you from accessing it. This is the practical meaning of self-custody: sovereignty over your own money, secured by cryptography rather than a corporate promise.
Now protect what you have. Your wallet's recovery seed phrase is the master backup for your bitcoin. Write it down on paper or stamp it into metal — never store it in a screenshot, cloud note, or email draft. As Jameson Lopp explains in his self-custody guide, the most common way people lose bitcoin is not through hacking but through losing access to their own keys. Store your seed phrase in a secure physical location, consider a second backup in a separate place, and never share it with anyone. If someone obtains your seed phrase, they can take your bitcoin with no recourse.
Common Mistakes and Final Checklist
The most dangerous mistake beginners make during withdrawal is selecting the wrong network. If you choose a non-Bitcoin network such as BEP-20, your bitcoin may be sent as a token on a different chain and could be unrecoverable. Always select the Bitcoin (BTC) network. The second most common error is an incorrect address — a single wrong character means your bitcoin goes nowhere you can retrieve it. Copy-paste carefully and verify the full address against your wallet display before confirming. Third, do not skip the wallet setup step. Generate your wallet, write down your seed phrase, and test a small receive transaction before moving a larger amount.
Here is your final checklist: Binance account verified for your jurisdiction — check. Payment method linked and fees reviewed on the live Binance fee page — check. Self-custody wallet set up with seed phrase securely backed up — check. Bitcoin purchased on Binance — check. Withdrawal initiated to the Bitcoin network with the full address verified — check. Transaction confirmed in your own wallet — check. You can explore more exchange options and considerations on our exchange overview page. The entire process may take less than an hour, but the result — bitcoin held under your own keys — is the difference between trusting a platform and trusting the protocol itself. For a Binance buying guide, the durable point is not that the exchange replaces self-custody, but that it can serve as a temporary on-ramp when the reader verifies the live fee, region, account and withdrawal details before acting.